Due to their decent size and weight, heating units that burn solid fuel are available in only one version - floor standing. But before installation, you do not need to get any permissions, the main thing is to observe basic safety rules and ease of maintenance. We will discuss this issue in this publication: we will consider how to correctly install a solid fuel boiler and connect it to a water heating system of a private house.
Installation instructions for a wood boiler
Regardless of which type of TT boiler you bought - direct burning, pyrolysis or pellet, the installation procedure remains unchanged and consists of the following steps:
- The choice of a specific place in a private house for the placement of a heat generator.
- Preparing the room for installation.
- Supply and exhaust ventilation device.
- Installation of a heating unit and chimney.
- Connection to the heating system (piping) and test run.

Note. Depending on the model of a wood or coal boiler, you may need to connect to an electrical network.
The first 3 points of the list relate to preparatory work, which does not detract from their significance. If you choose the wrong location of the unit and do not provide for normal ventilation, then you will have to solve the problems that arise during operation, in the middle of the heating season. So we offer to disassemble each item individually.
For the correct selection of the heat source by power, we recommend that you calculate the heat load of the heating using an appropriate technique.
Where is it better to put a TT boiler
It is noteworthy that no country in the former USSR has developed a specific regulatory document to regulate the installation of solid fuel boilers in private and apartment buildings. The main part of the requirements is set forth in the SNiP “Heating and Ventilation”, separate standards are found in the SNiP 31-02-2001 “Single-family houses” (for Russia) and in other separate acts.

Reference. Many Internet resources send us to read the huge SNiP “Boiler installations”, not considering that its effect extends to heat generators with a capacity of more than 360 kW (paragraph 1.2). Others suggest that we follow the rules for gas heaters. Both options are erroneous: the requirements for the placement of household TT boilers are not so stringent.
We analyzed the normative documentation regarding the placement of wood-fired water heaters, added the practical experience of our experts to them and made a list of recommendations on the location of the unit:
- The use of firewood, coal, and even a briquette with pellets implies increased dust content, and in the process of heating, smoke in different quantities enters the room. Therefore, it is extremely undesirable to put the boiler in the house, although the norms allow it to be placed in the kitchen, in the corridor and in other rooms, except for the bedrooms.
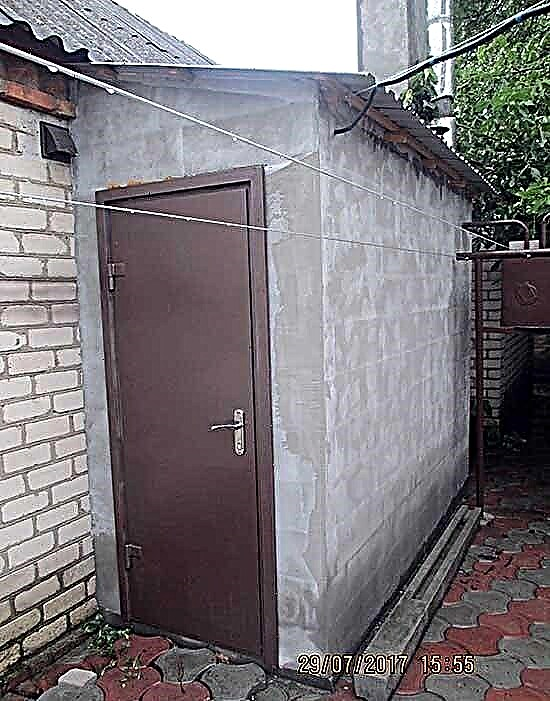
- The best places for a solid fuel heat generator: a boiler room on the street (detached or attached to an existing building), a technical room inside the house, a basement or a garage. An extreme option is a well-ventilated corridor.
- It is advisable to install the unit closer to the external wall so as not to lay a long horizontal section of the chimney or to bring it out through the ceiling.
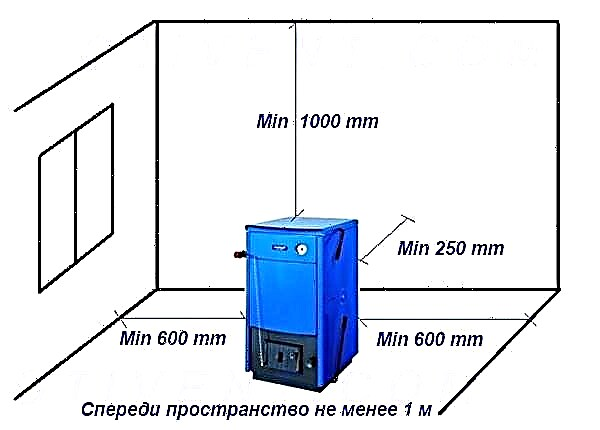
- To maintain and clean the heat exchanger of the TT boiler, provide access to it from the right sides. Ideally, the front should have at least 1 m of free space, and 60 cm on the sides and back (minimum 25 cm).
- Do not expect to connect the flue of the wood heater to the brick ventilation ducts inside the walls, this is strictly not allowed.


Tip. Before you purchase and install a long burning boiler of the Stropuva type, compare its height with the rooms. Consider the location of other bulky equipment - a heat accumulator, a buffer tank, and an indirect heating boiler.

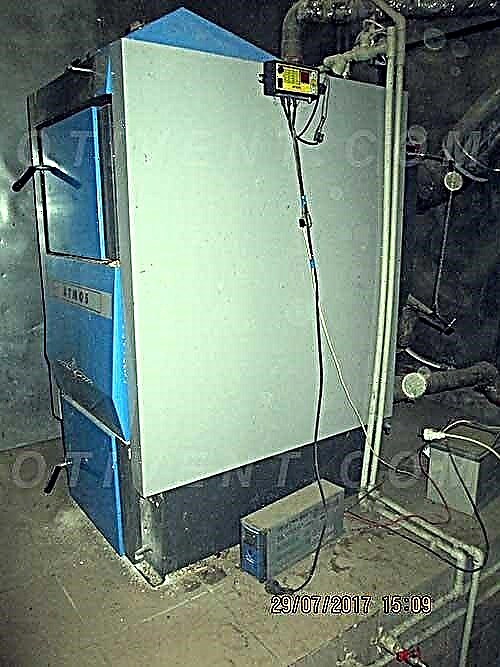
In a small-sized furnace, move the boiler with its unattended side to one of the walls (minimum spacing is 10 cm), and leave behind an opening with a width of at least 250 mm, as shown in the photo.
About room preparation
What you need to do before installing the TT boiler in the intended room of the house:
- provide a foundation and, if necessary, cast a concrete foundation;
- punch holes in the wall for chimney and ventilation;
- walls and floors constructed of combustible materials shall be protected from fire by sheets of metal, asbestos cement, basalt cardboard or minerite.
Recommendation. If only lighting is made in the furnace, then put there an electric line from the outlet network. All the same, you will have to power the circulation pump, or even the automation of the new heat generator.

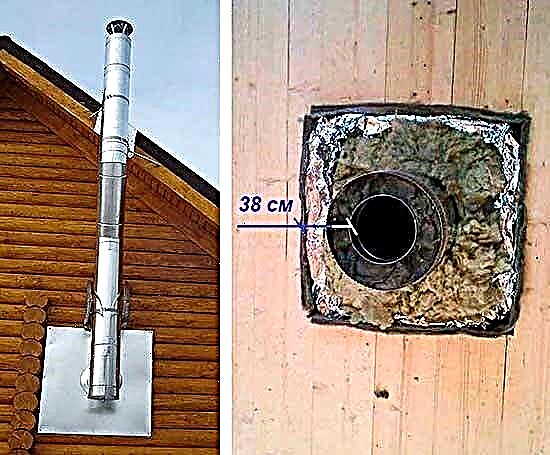
The wooden cladding of the walls and floor is not necessary to tear off. If the boiler is moved closer than 38 cm to the combustible wall, cover the latter with one of the materials listed above. Lay the same sheet on the floor below and in front of the TT boiler with a protrusion of 80 cm. This is protection against heat particles flying out of the open door.
Regarding the foundation required by all manufacturers in the operating instructions, we will give such recommendations:
- Place low-power heaters weighing up to 200 kg on a cement screed. If it is arranged correctly, it can withstand such a load without problems.
- Installation of a solid fuel boiler weighing up to 300 kg will require a reinforced concrete screed 10–12 cm thick, and over 300 kg a separate foundation slab.
- Pellet heat generators equipped with a feeding screw and an electric motor exert a vibration load on the base. So, you need to cast the foundation depicted in the diagram.


Tip. Small TT boilers can be placed on a wooden floor. But first, you have to strengthen this section with your own hands, installing additional logs from the beam with a minimum cross section of 100 x 50 mm.
If you plan to put a tank in the boiler room - a battery and other heavy equipment, it makes no sense to fill the foundations for each unit. Make industrial floors - a concrete screed 12 cm high with reinforcement with metal rods with a diameter of 8-14 mm. Wire a mesh with a mesh size of 20 x 20 cm and lay it on a pillow of compacted rubble, as shown in the video.
How to make ventilation in the boiler room
Air exchange in the furnace is organized with the aim of:
- provide the solid fuel boiler with the right amount of combustion air;
- throw out flue gases that accidentally fall from the firebox into the room;
- to compensate the removed air with the same amount of inflow.
For reference. To completely burn 1 kg of wood, it is necessary to supply about 4.6 m³ of air. The burning of 1 kg of coal will require from 8 to 9 m³ depending on the grade and quality.
The following recommendations will help you organize the supply and exhaust ventilation in the boiler room with a solid fuel unit:
- Place the exhaust and supply openings at different ends of the furnace. Do the first under the ceiling, and the second in the lower zone, closer to the TT boiler.
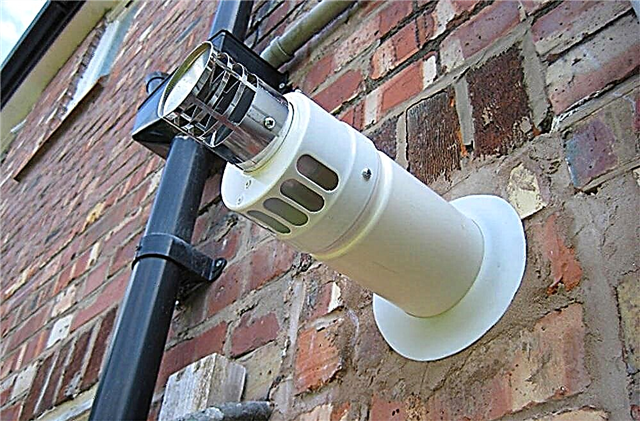
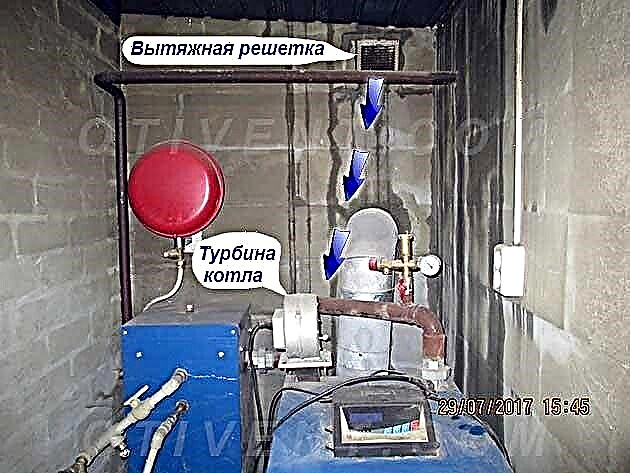
- Do not exhaust near a heat generator equipped with a fan - blower or smoke exhaust, as shown in the photo. A working turbine will forcefully overturn the draft in the duct and turn the hood into a supply.
- If the door from the house leads to the boiler room, it is better to integrate the supply grille in the lower part of its canvas. The supply of heated air will increase the efficiency of burning wood.
- Since the lion's share of the influx enters the combustion chamber, reacts with the carbon of the firewood and comes out in the form of carbon dioxide, the exhaust outlet must be made smaller than the supply.

Calculate the hood cross section in an enlarged manner: multiply the heat output of the heater by 8 and get the opening area in cm².

Example. For a 25 kW boiler, the cross-section is 25 x 8 = 200 cm² or 0.02 m². The dimensions of the exhaust opening are easy to determine - 10 x 20 cm (0.1 x 0.2 m). For the influx, take a 15 x 20 cm grid.
Video: heating unit placement options
We mount a heat generator and a chimney
As such, installing the heating boiler on the floor or foundation is not difficult - the unit must be put in the design position and vertically aligned with adjustable legs or metal linings. Scrupulously withstanding the alignment of the chimney pipe and the holes in the wall is optional: they are combined without problems due to the rotation of the knees.
An important point. To prevent condensation formation during operation, it is strongly recommended that the chimney of the wood heater be assembled from insulated pipes - sandwiches. The second option is to make a chimney with your own hands: take a regular pipe and sheathe it with basalt fiber.

It is easiest to mount an external chimney duct of an attached type. That is, attach the pipe vertically to the wall and connect the gas duct from the TT boiler through a tee. In a wooden house, passage through an external wall or ceiling for roofing is carried out in compliance with fire safety rules using the following technology:
- Cut a square opening in the partition whose dimensions are larger than the inner chimney by 38 cm in each direction. For example, if the diameter of the channel is 100 mm, and the thickness of the insulation of the sandwich is 5 cm, then the size of the opening will be 100 + 380 x 2 = 860 mm.
- Install the galvanized steel bushing in the form of a duct.
- Pass a sandwich pipe through it, and fill the void with basalt cotton wool.
- Fasten the outer cover of the assembly.

Note. Through a wall of brick or foam block, the chimney is laid using a steel sleeve and gasket.

Next, we list the requirements that must be met during the installation of the chimney duct:
- the number of pipe turns is not more than three, the minimum height (calculated from the grate of the boiler) is 5 m;
- sections (modules) are joined together so that condensate can drain inside the pipe and rain outside;
- mount the horizontal part with a slight slope towards the heat generator;
- in the lower part, install the inspection hatch and condensate collector;
- so that you do not have to cross the roof cornice, go around it with a pipe using two 30 ° elbows;
- wall brackets should not coincide with the joints of the chimney sections;
- put a cap in the form of a cone or a rotating weather vane on the top of the chimney.

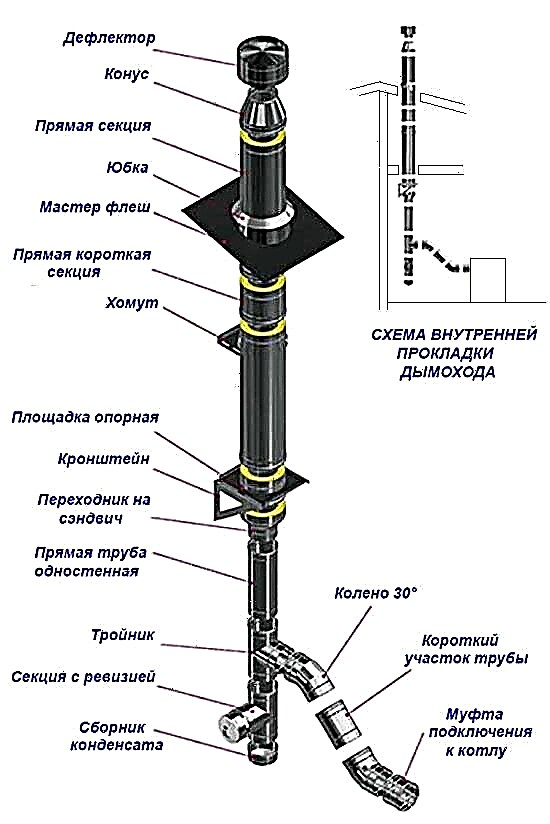
The correct installation and assembly of the modular chimney is reflected in two connection diagrams, which show the external and internal gaskets through the ceiling.

Important notice. Make sure that the tip of the chimney canal is not in the area of the wind support of the roof of your or neighboring house. To maintain traction, raise the pipe to the mark shown in the diagram above.
We are connected to the heating system
When the installation of the solid fuel unit and the installation of the chimney are completed, proceed to the boiler piping. Here the main rule applies: cold water should not get into a working heat generator (especially with a cast-iron heat exchanger). Then on the walls of the firebox from the temperature difference condensate forms, turning into a viscous crust after mixing with soot.
For reference. Sticky coating is difficult to peel off, in addition, it noticeably reduces the efficiency of a solid fuel plant.

Condensate generation during operation of a solid fuel boiler is minimized using a typical piping scheme with a bypass and a three-way valve tuned to a fixed coolant temperature of 50 or 55 ° С. Water circulates in a small circle until it heats up to the indicated temperature, then the valve begins to mix cold water from the heating system.
All the details of connecting a solid fuel boiler are described in a separate publication. There are also diagrams of the heater piping with a buffer tank and parallel heat sources - gas and electric.

Tip. When tying the pellet boiler, pay attention to the connection of the control unit and the burner. In products of European manufacturers there is an automatic fire extinguishing system powered from a water supply network. In order not to make mistakes, before installing a pellet TT boiler, it is worth consulting with a technical specialist of this brand.
Conclusion
On the one hand, the installation of a solid fuel boiler is a fairly simple procedure, no strict requirements are put forward for it and no permission is required from officials. On the other hand, the process is troublesome and time-consuming, associated with a thousand small nuances. However, the homeowner always has a choice: do all the work on his own or give some part (for example, strapping) to the trained personnel of a specialized company.